In this blog post, I’m breaking it alllll down and sharing where we spent and where we saved to keep our kitchen renovation under $10k!
Renovations are expensive. Kitchen renovations are really expensive! But we knew our kitchen had good bones so we were determined to to work with what we had and not move any plumbing, walls, appliances, etc. A “no demo reno” if you will. From other DIY projects in our home, we quickly learned that we could cut the renovation cost down significantly if we completed the work ourselves. So this project meant we were going to wear many different hats and learn many different skills such as tiling, plumbing, painting, light installation, etc.! We are by no means professionals, just a couple of 30-somethings trying to make our home a place we love so there’s always a lot of trial and error. We’re not the DIY couple that just shows the perfect and pretty side of DIY, but the couple who will take you along on the ride while we try to figure out how the heck to hook our plumbing back up correctly for 4 hours, fail, and then have to call the professionals in for help.
Something we think is greatly lacking in the home renovation sphere is transparency about how much projects actually COST!! There seems to be such a weird stigma around still about NOT talking about money. Heck, even some of the shows on HGTV don’t show how much the renovation costs! Just the process and the pretty aftershots that leave the viewer thinking, “I love that kitchen, but how much would that cost to do in my home?” We’re an open book over here at @homewiththehamanns and feel like breaking down the cost of each of our renovations helps others realistically plan for their own DIYs! Here’s how we spent our money on our “no demo” kitchen.
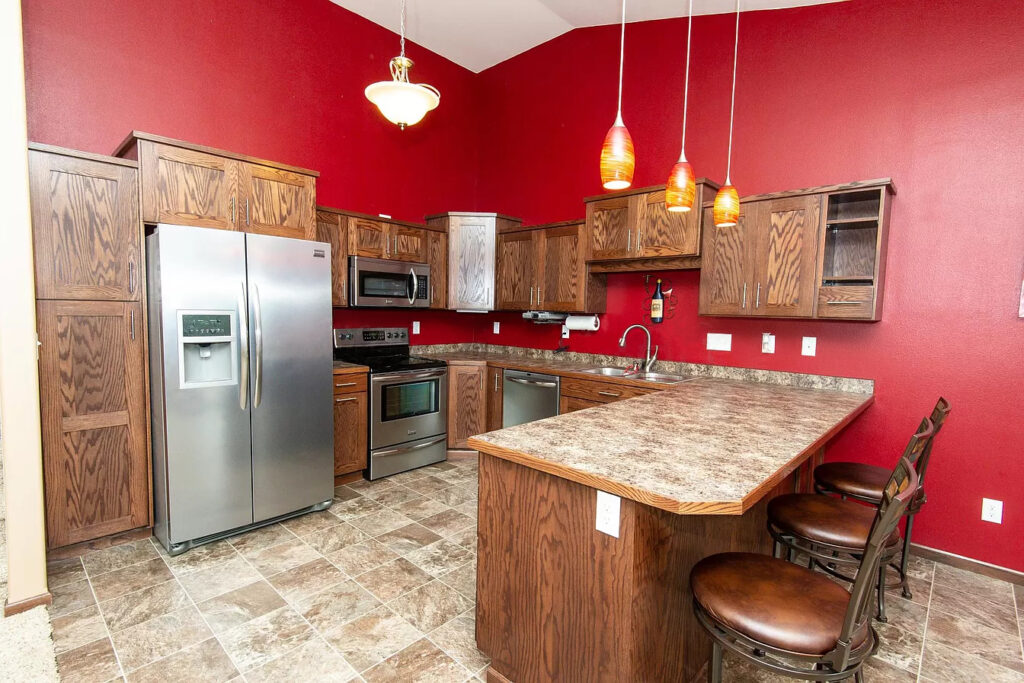
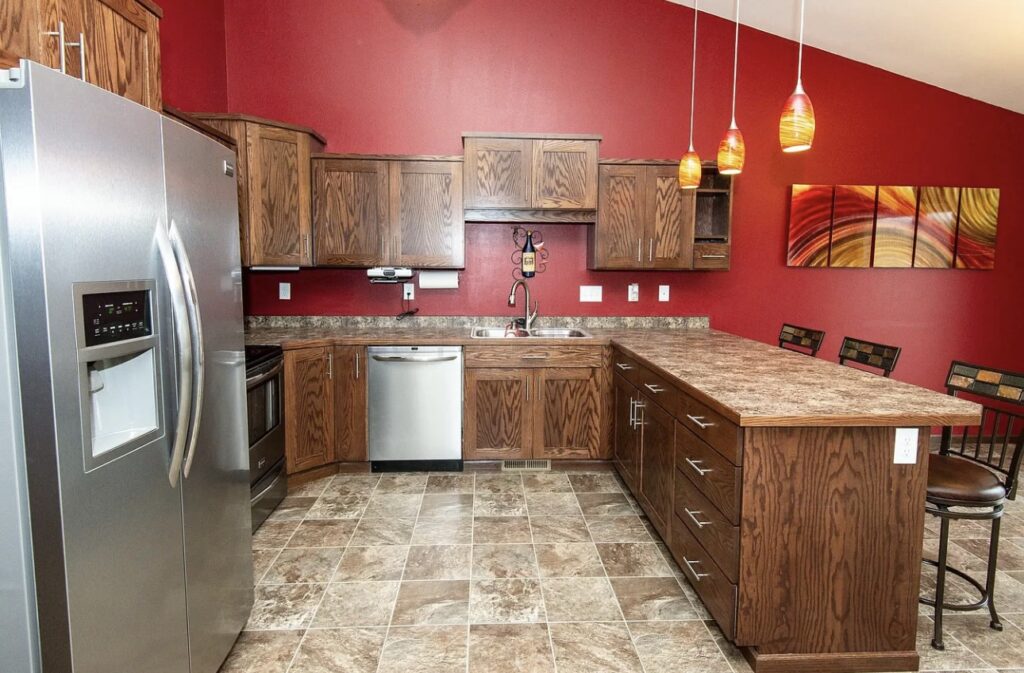
Before we get to the renovation you need to see where we started:
Renovation Part 1:
Part one of the kitchen renovation started in November of 2019 when we got the keys for our first home! Our goal for this part of the renovation was to spend the least amount of money possible to get the kitchen to a more aesthetically pleasing place (goodbye red wall that made my head spin) for the next couple of years while we saved up for the the bigger portion of the renovation. During this time we were living off of Jeff’s substitute teaching and minor league umpire salaries as I was in grad school working on my doctorate degree. Money was TIGHT and we had a strict budget to stick to! Here’s the price breakdown of this phase:
Flooring-$300
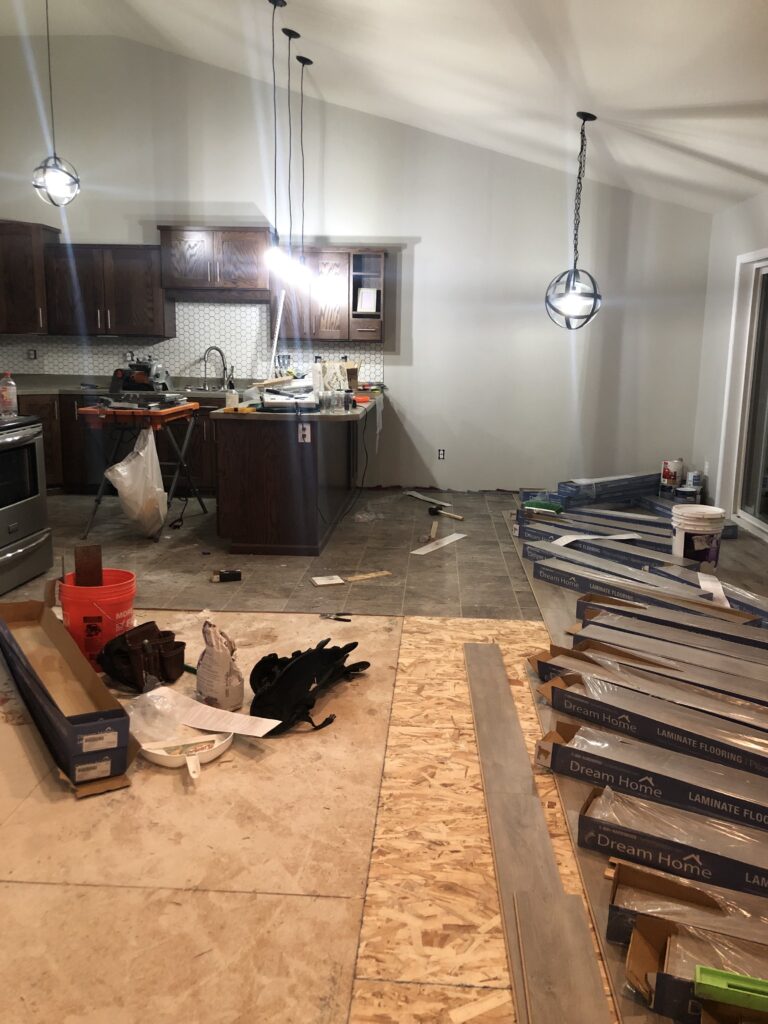
Installed new flooring in the kitchen and connecting dining room space from LL Flooring. We went with a luxury vinyl plank due to how durable and cost-effective it was! To be completely honest it was the cheapest of the samples that we had which definitely swayed the decision at the time. Although I really like our floors, truthfully I would go back and choose a flooring with a bit of a warmer tone but oh well, I’ll save that for our next house ;P Jeff laid all the floors in our home so we saved a lot of $$$ by not having to pay for labor.
Paint/supplies-$125
I can’t even explain to you the satisfaction I got from painting the AGGRESSIVE red wall. It was the first thing everyone noticed when they walked into our home and it made me hate our cabinets! With our walnut-stained oak cabinets up against the red they were pulling an orange tone and I initially wanted to paint them *gasp*!! Jeff talked me out of it and said we should paint the walls first and then make a decision on the cabinets. To this day I’m still thankful he forced me to chill and paint the walls first because our cabinets are my absolute favorite feature of our home now! Okay back to the paint-we went with Agreeable Gray by Sherwin Williams throughout the space because we wanted a neutral color and truthfully I had seen this color everywhere and loved it in other people’s homes. Our moms came over to lend a hand with painting and the space was knocked out pretty quickly and to all of our surprise, the red was covered in only a couple of coats of paint (praise the lord)!
Backsplash/grout- $78
The story behind our first backsplash is a comical one! We wanted to put something up as our kitchen didn’t have a backsplash but didn’t want to spend much. As we were walking through Home Depot for the 10th time that week (as one does during a renovation) we saw a final sale end cap on an aisle. On it were just enough boxes of a white hexagon tile that we would need to complete our kitchen for a whopping….$60 total!!! We didn’t even think about it, we just started loading it into the cart because we weren’t gonna be able to beat that price!
We had ZERO clue how to tile, but lucky for us one of Jeff’s friends was a tile installer who graciously helped and taught us how to install. This labor only cost us a box of Sandy’s Donuts (iykyk) so we thought it was a fantastic deal!
Concrete Overlay Countertops-$300
I hated our laminate-speckled countertops the second I walked into our home. They HAD to go but we couldn’t afford to replace them at this point in our lives. We thought about painting them, but every review I saw said they started chipping within the 1st year and didn’t stand up to stains and heat well. We kept looking for a budget-friendly option and then one day I asked Jeff if we could cover them in concrete! I loved the look of concrete counters at the time but knew actual concrete countertops weren’t in the cards for us, so I thought why not just skim-coat the tops with concrete to create the same look for a fraction of the price! To be honest we couldn’t find much information about this online so Jeff did what he does best-dove head first into a project with a prayer and a plan he concocted. The process was long and messy but SO worth it! Let us know in the comments if you would like us to share about the process more in-depth in another blog post!
Lighting-$75
The lighting that matched the fire-red walls and yellow/orange artwork just wasn’t my vibe so right away I knew those had to go. Lucky for us, my brother is an electrician so he was able to help teach us how to safely change out light fixtures in our home and I am so grateful for that because it has saved us so much money while renovating the rest of our home! The original lights I chose were once again based on price-$12 at Home Depot for pendant lights?! Add to cart immediately!
Renovation Part 1 Total: $878

Renovation Part 2:
This part of the renovation started in the spring of 2023. We had spent the last 4.5 years saving up for the upgrades we really wanted in our kitchen and now was finally the time to get it all done! The goal of this phase was to balance keeping some of what we had while upgrading other portions. For example, to save money we kept all of our appliances and didn’t refinish our cabinets at all. Did I want a vent hood and beautiful Cafe appliances? Sure, but that would have sent our budget through the roof! Renovating on a budget requires some compromise and our perfectly good appliances were going to stay! The price breakdown for this phase was as follows:
Quartz Countertops-$6,200
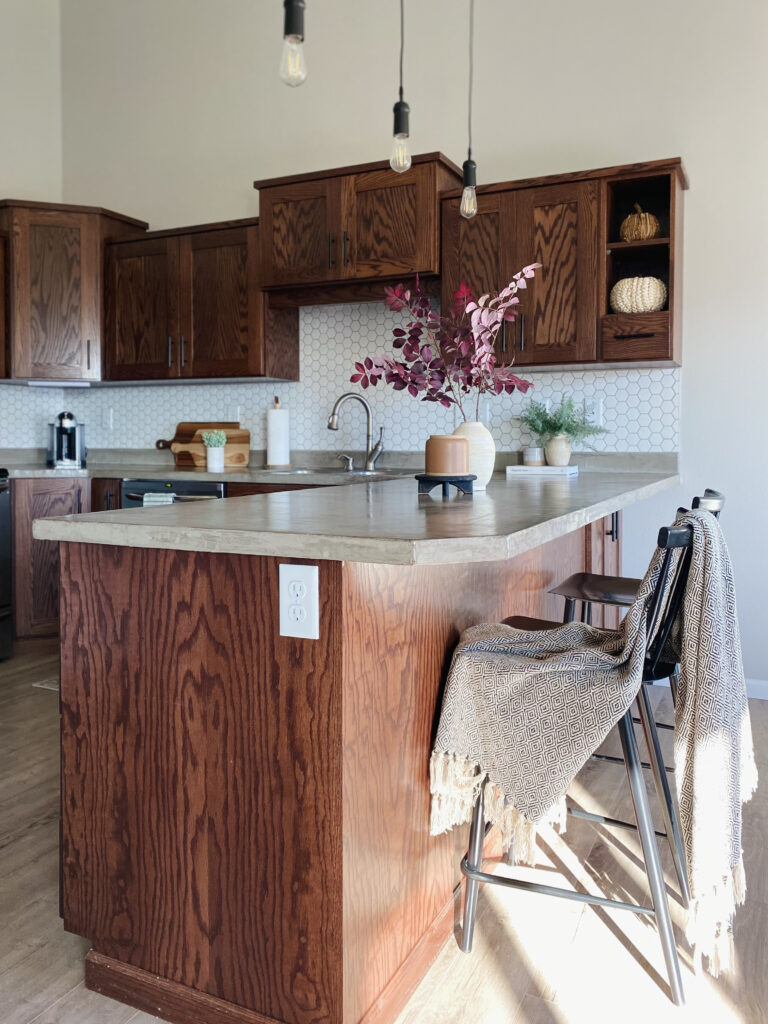
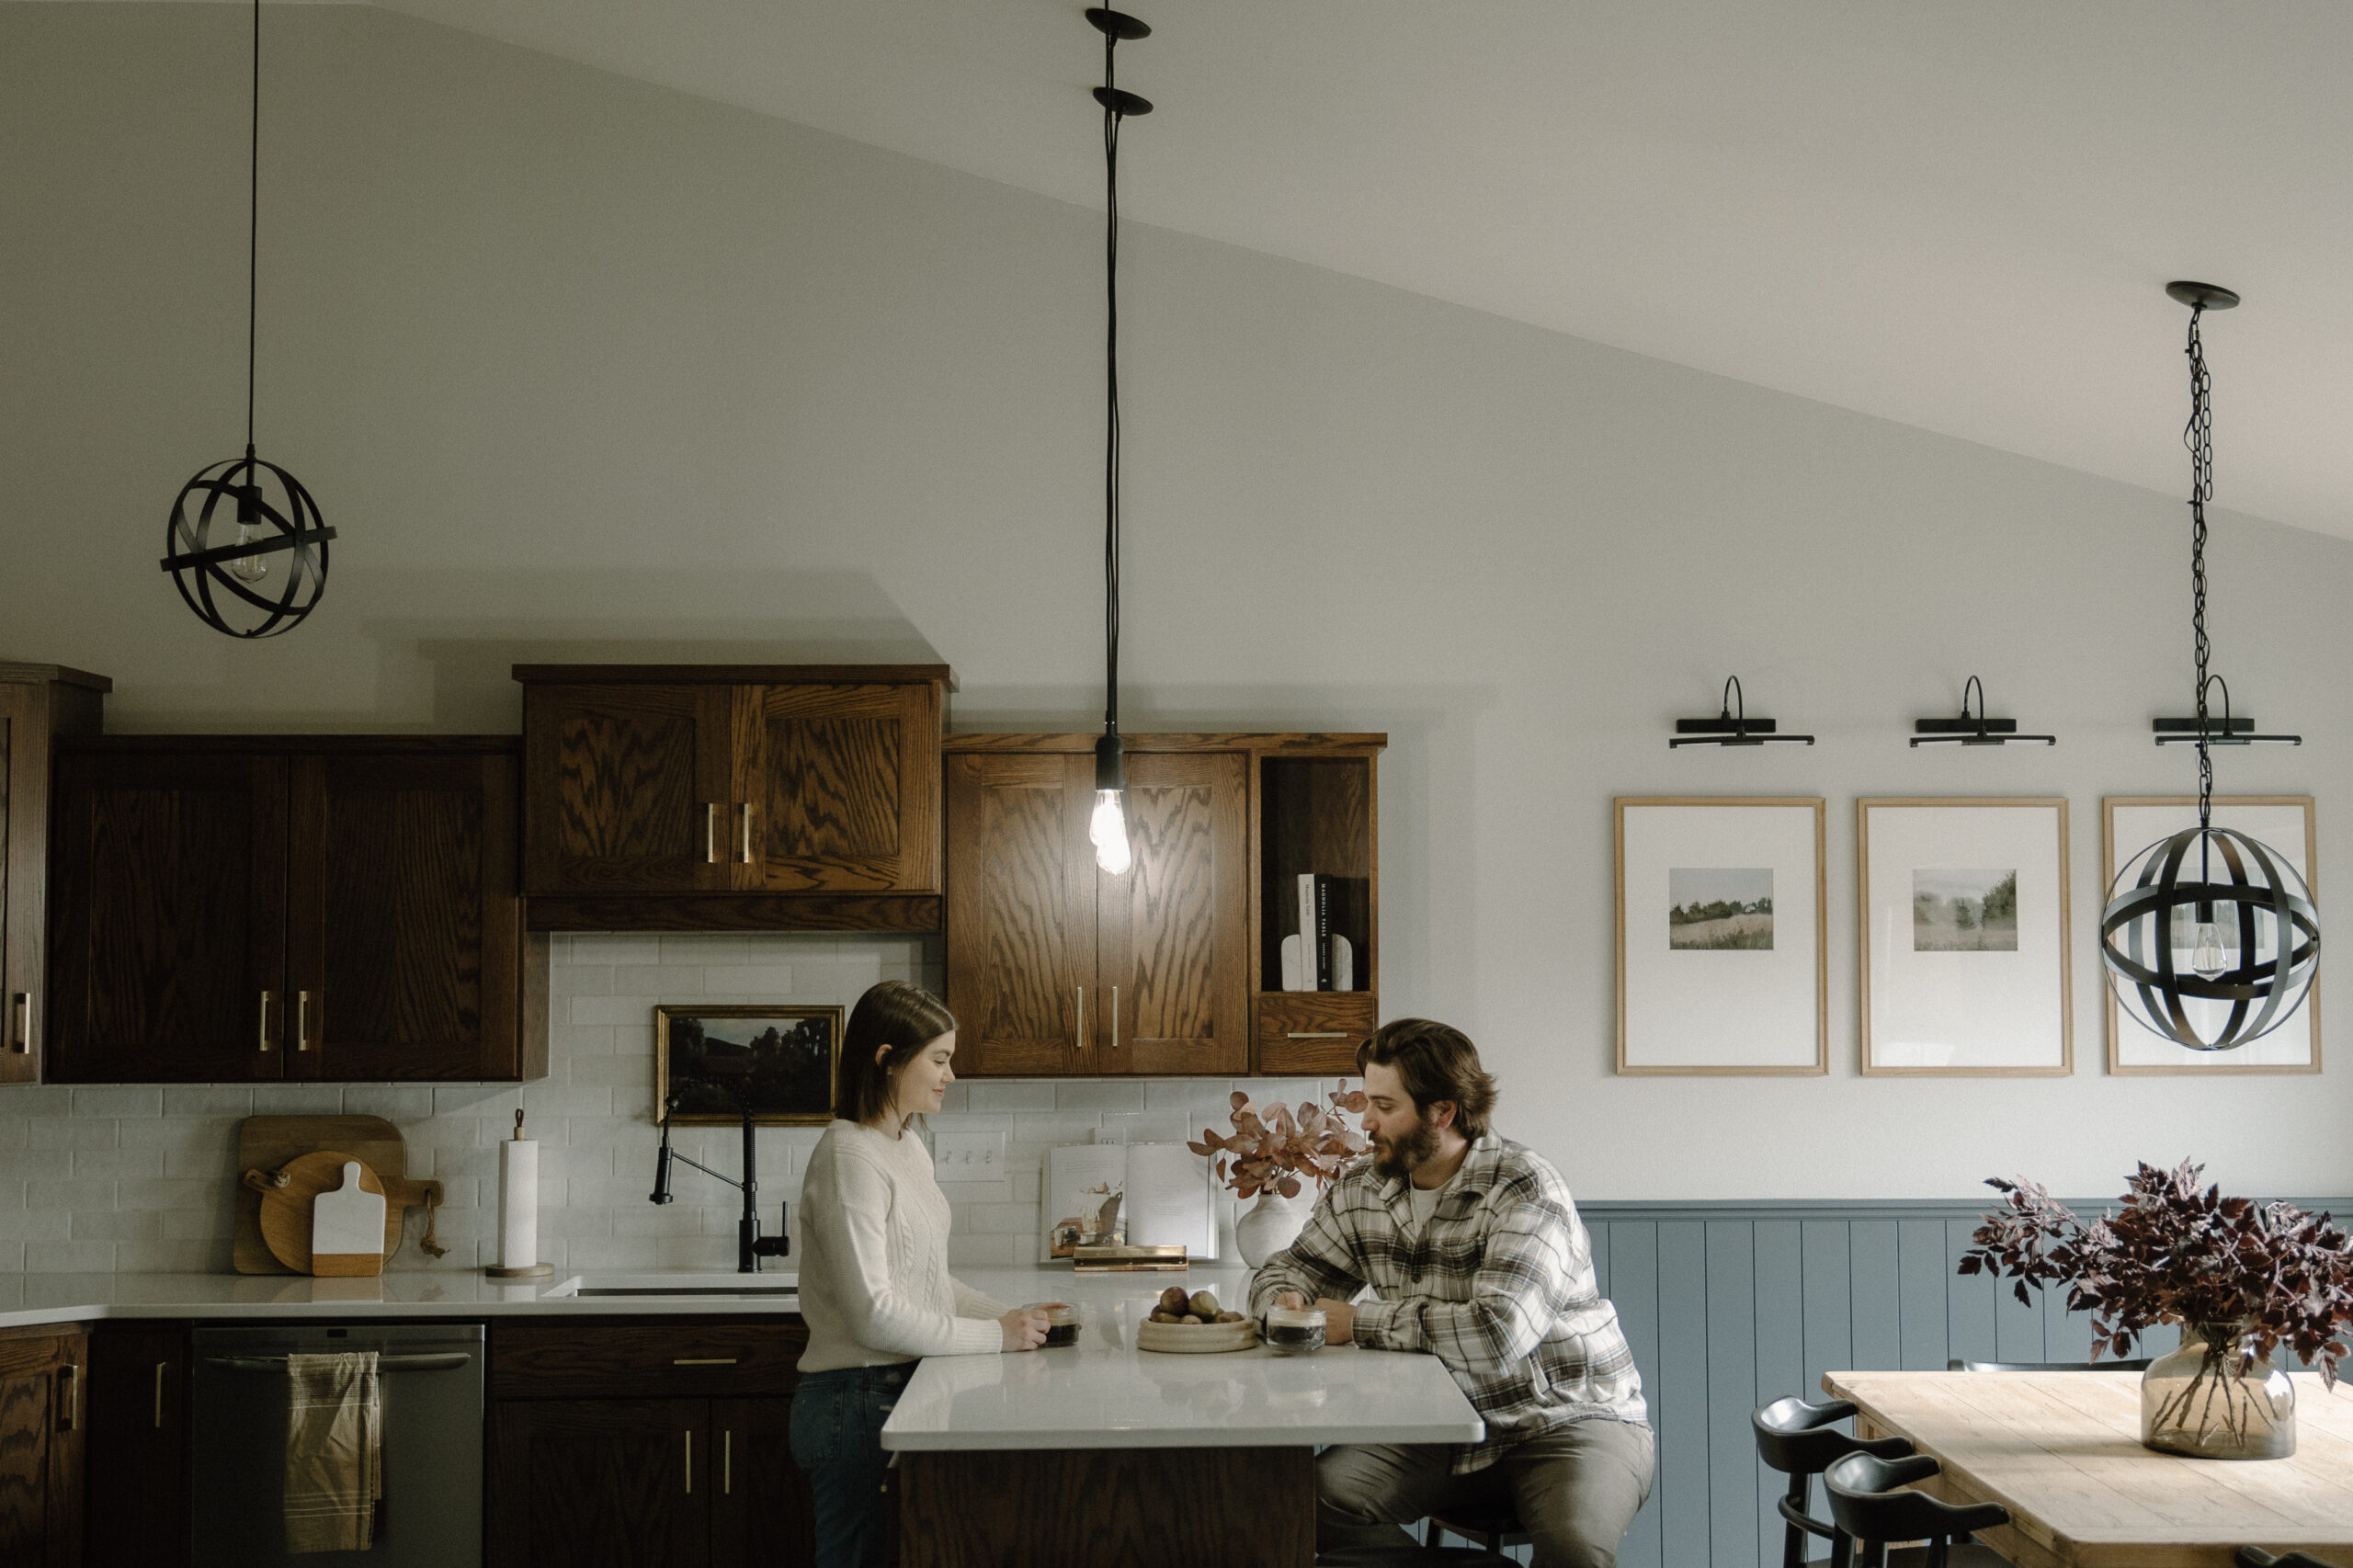
This part of the renovation we left to the professionals. I wasn’t about to spend $$$ on an expensive slab of stone and then be the one responsible for breaking it!! We worked the Northern Stone here in Fargo, ND and the stone selection and service was phenomenal. If you are local we totally recommend using them for your renovation! This price included the removal/disposal of our old countertops, installation of the new counters, a new stainless steel sink, and the installation of the sink. We decided to go with a polished quartz by Vicostone in the color Aspen due to the stone’s durability and low maintenance. The subtle veining added the movement I was looking for without competing with the wood grain of our cabinets.
Backsplash- $879
Now you’re probably thinking to yourself, “Megan, why did you rip out and replace your backsplash?” And the honest answer is I didn’t like the $60 backsplash we had originally chosen. Zero thought went into picking it and it looked silly up against our new, beautiful stone countertops. I wanted something equally as beautiful and would be timeless in this space. We were already in full demo mode so it was now or never to switch it out.
Enter the ever-popular Hand Craft White Tile by Alexander James Tile Shop. In full transparency we received a discount on this tile for working with this brand, but even if we hadn’t this was where I would have ordered from. The tile is 2.5″ x 8″ ceramic tiles with a gloss finish and is sourced from Europe! We still have a few boxes left over because you want to make sure you order 10% overage. Especially with the variation in this tile!
Alexander James Tile Shop has given me a 10% off discount code: HAMANNS for our followers to use. Shop it out for yourselves if you’re interested in this tile or any other tile they offer!
For grout, we went with the color “Snow White” by PolyBlend Plus which is sold at Home Depot. We felt this color brought some warmth to the tile and pulled in some of the veining tones on our countertops!
Kitchen Faucet/Sink- $179
I love our Kraus faucet so much! It’s stylish, functional, and didn’t break the bank. Before shopping for this faucet I didn’t realize that it was normal for kitchen faucets to be thousands of dollars!! That just seemed insane to me when I would be using it solely to fill my cup with water and wash dishes. I was able to wait until Amazon had a sale and was able to score this faucet for under $200! We reused the garbage disposal that we previously had which also saved us some money.
Our kitchen sink was included in our countertop price as we bought it from the company that installed our countertops, but I’ll share the details of it here! Originally I really wanted a farmhouse sink, but unfortunately it didn’t work with our current cabinet set up so that want went out the window quickly! Then Jeff and I couldn’t agree on a single-basin sink or a double-basin sink. I was team single basin because washing big pots and baking sheets in a double basin is the WORST. Jeff wanted double basins so that when we were washing dishes we would still have one side to wash and one side where the dishes could dry and not clutter our counter. Northern Stone solved this problem by showing us a sink we could compromise on- The Ruvati Urbana Undermount Stainless Steal Sink has two basins but the divider doesn’t go all the way to the top to accommodate more space for washing large dishes and allows for there to still be a drying portion of the sink for when we washed dishes!
Cabinet Hardware-$50
After browsing hardware that some of the bigger home influencers had in their kitchens I quickly learned that we were in different tax brackets because there was no way in heck I was going to spend $50 on a SINGLE cabinet pull!! So off to Amazon I went to find an affordable dupe and thank goodness I found one! For all 33 pulls we needed for our kitchen I paid a whopping $50 TOTAL (happy dance)!
Decor-$100
And now for the pretty stuff! One of my biggest tips for decorating any space in your home is to “shop your home” first. What I mean by that is check other rooms in your home to see if pieces can be moved around or if you’re like me and hoard decor pieces check the “pit” (our basement) for anything that might be able to work prior to purchasing something! I’m always moving pieces around in our home so this method has worked really well for me.
Plumber-$280
After having our new sink installed we realized that our old main waste pipe connection needed to be lowered to accommodate our new bigger and deeper sink. Jeff attempted this on his own at first but we soon realized we needed to call the professionals in. And I’m here to tell you it was worth every penny!! Plumbing on a sink we use multiple times a day needs to be completed correctly and we know our skillset well enough to know this was just too much for us to complete on our own.
Renovation Part 2 Total: $7,688
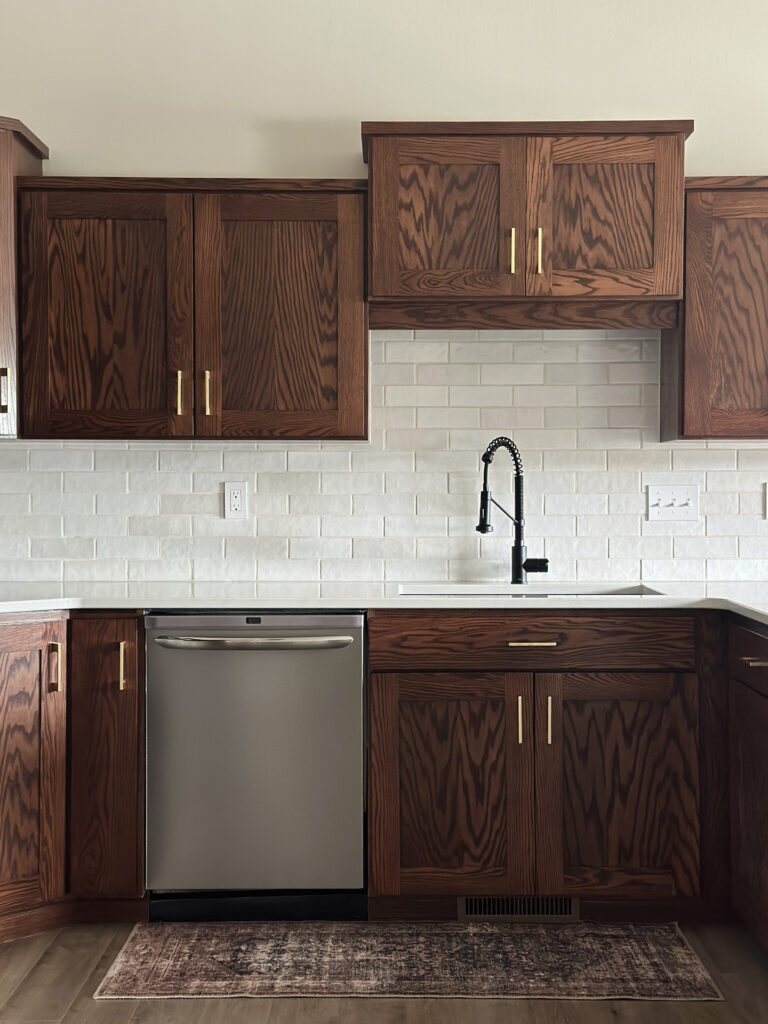
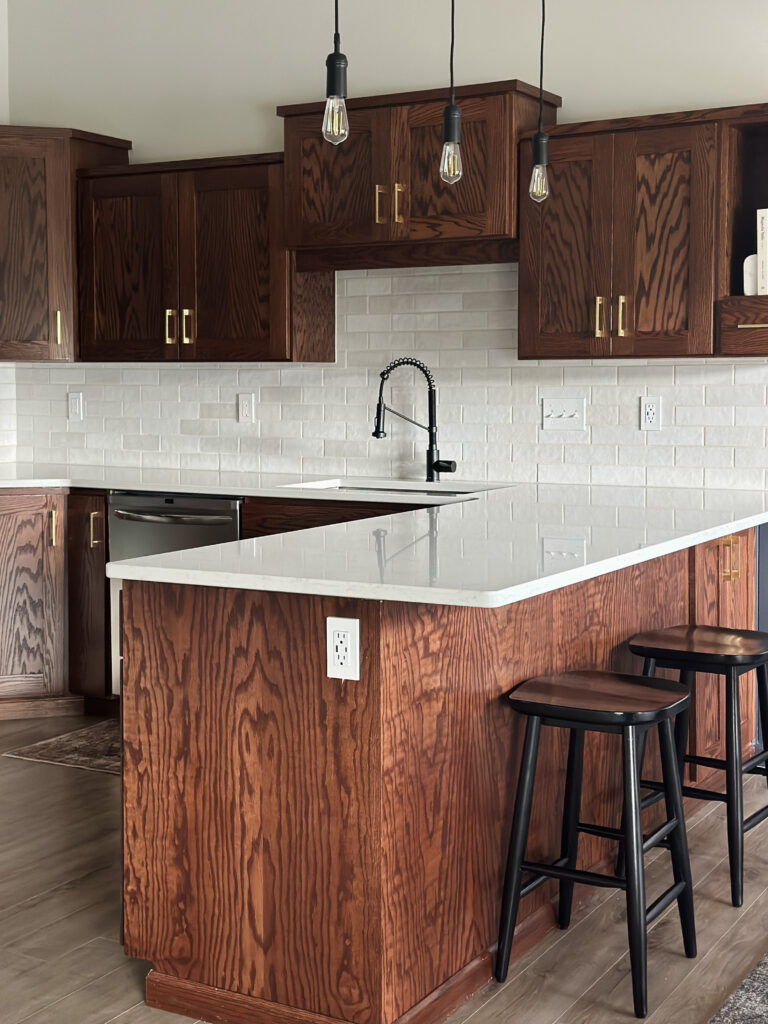
Leading our Total Renovation Cost to be $8,566!
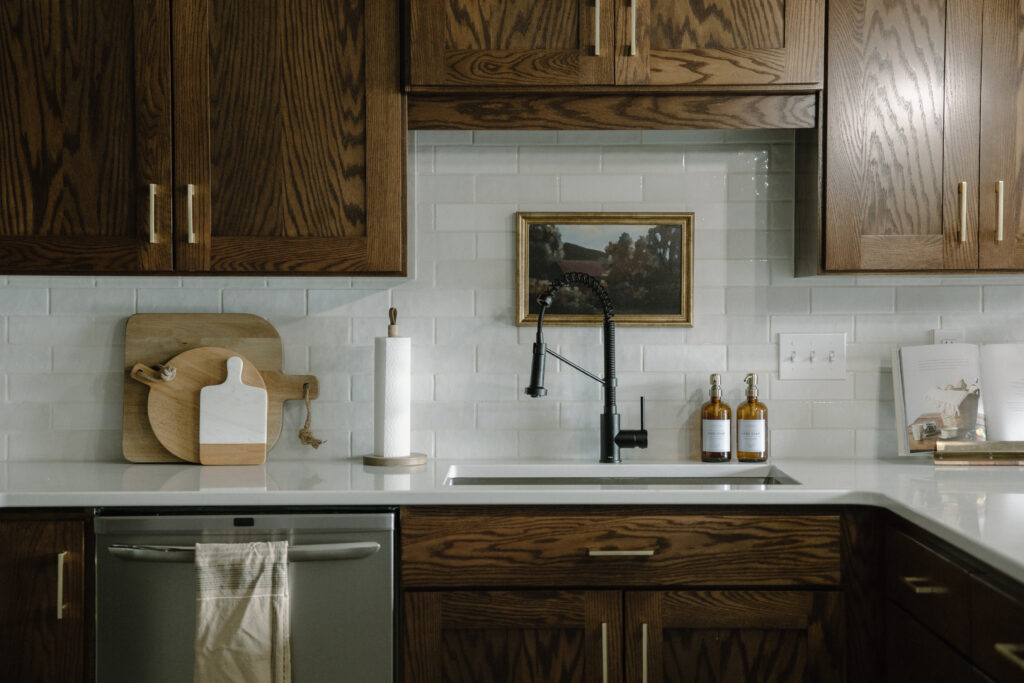
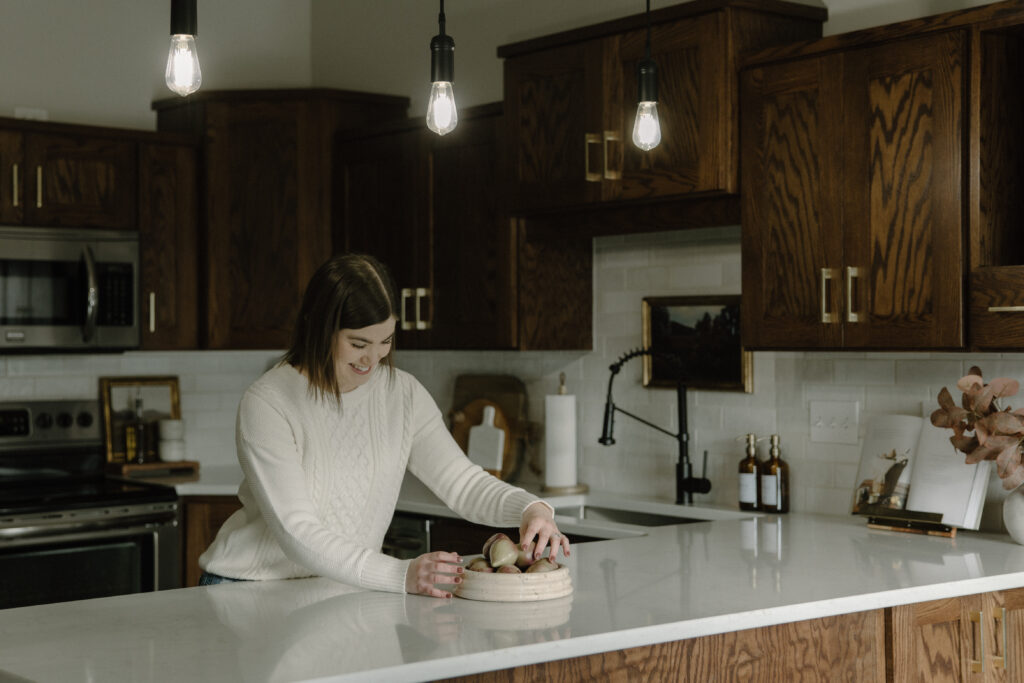
Photos by Revel Woods Photo
Final Thoughts:
I’m so proud of how this space turned out and how we were able to stick to our goal of staying under $10k for this renovation! With the average kitchen renovation cost for 2023 being $14,611-$41,432 for a small kitchen (according to HGTV) I’m happy we were able to stay well below that. We learned a lot of lessons from this renovation! Patience, how to budget and plan for bigger projects in the future, and most importantly when to ask for help. I hope this helps shed some light on what a kitchen renovation REALLY costs!
For a full round up of our kitchen sources see below:
Shop our kitchen materials here
*All links are affiliate links, which means I make a small commission from the brands for each sale. Thank you SO much for your kind support always.
Would love to hear what you think below!
Relatable Designs, Cost-Conscious Luxury - From Our Home to Yours
Finding Beauty in the Space You’re In
shop our home
work with us
website and branding design by daniela naomi co.
© home with the hamanns | featured imagery by revel woods photo
tik tok
pinterest
Connect
Navigate
About: The Hamanns are a husband and wife duo who document their home renovations - Inspiring others to create a home that feels intentional, functional, and beautiful without breaking the bank.
Be the first to comment